Category Archives: Mail
From Exchange 2016 CU6 and for Exchange Online customers it is now possible to control the “Sent Items” behaviour of delegated User Mailboxes. This control is available for shared mailboxes since 2015.
How does it work?
Let’s say you have the following scenario:
- Jack is the CEO of the company
- Iris is a delegate on Jack’s mailbox; Iris has Send As rights on Jacks mailbox
- When Iris sends an email as Jack, the mail will only be in Iris’s “Sent Items” folder.
With the new feature enabled, the email will not only be in Iris’s “Sent Items” folder but both Jack and Iris will have the message in their “Sent Items” folder.
How to enable these settings?
These settings have to be set via powershell and cannot be set via the EAC / o365 portal as with shared mailboxes.
To enable these settings for “Sent On behalf”:
Enable message copySent On Behalf of the delegator For emails Sent On Behalf of the delegator:
Set-Mailbox <delegator mailbox name> –MessageCopyForSendOnBehalfEnabled $true
Disable message copySent On Behalf of the delegator For emails Sent On Behalf of the delegator:
Set-Mailbox <delegator mailbox name> –MessageCopyForSendOnBehalfEnabled $false
To Enable these settings for “Sent As”
Enable Message copy:
Set-Mailbox <delegator mailbox name> –MessageCopyForSentAsEnabled $true
Disable Message copy:
Set-Mailbox <delegator mailbox name> –MessageCopyForSentAsEnabled $false
In this 3-part blog I will discuss SPF, DKIM and DMARC. In this second part of the blog I will discuss DKIM.
DKIM stands for DomainKeys Identified Mail.
To understand how DKIM works, you can best look at it like when you sign a letter that you send by snailmail. DKIM sets up a form of signing for email, a key is sent with the email, which can be matched by the receiving party. If there is a match, then the signature of the email is genuine, and the email is forwarded to the receiving user. If there is no match, depending on the settings in the antispam tooling of the receiving party the email will be tagged as SPAM, deleted or just delivered.
DKIM for Exchange
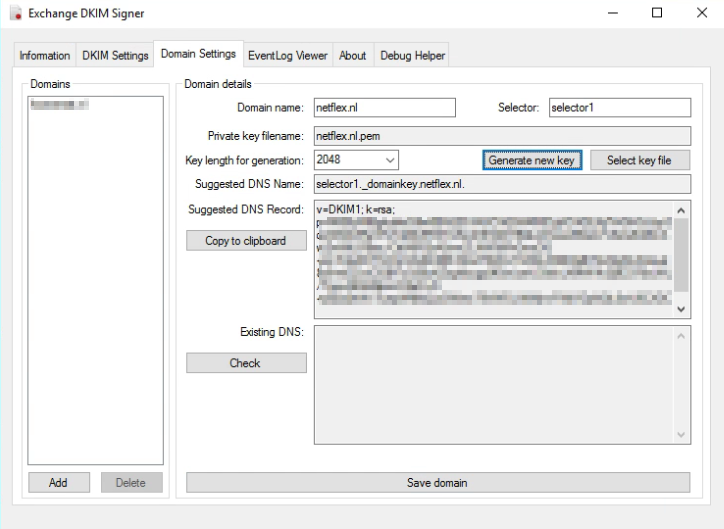
For Exchange onPrem there is “Exchange DKIMSigner” this is a freeware tool, which can add DKIM signing to your emails. (https://github.com/Pro/dkim-exchange).
With this tool you can easily generate a private key, and it shows you the suggested DNS record.

Setting the DNS record.
Setting the DNS record for Exchange Onprem works a bit different from setting the DNS record for Exchange Online. With Onprem you put the public key in the DNS record, so the other party can pick it up, with Exchange Online you point to another microsoft address for the public key (see DKIM for Exchange Online below).
With Exchange Onprem you only need one cname record:
Host name:			selector1._domainkey.<domain>
Points to address or value:	<Public Key Information>
TTL:				3600
For Example:
Host name:			selector1._domainkey.netflex.nl
Points to address or value:	v=DKIM1; k=rsa; p=MIIBIjANBgkqhkiG9w0BAQEFAAOCAQ8AMIIBCgKCAQEAjj7VrGHGJJzySqziW0AVReVFoTqlMo5RSTmKwZ3Fd2XY9QkJ21xweKEsxLFzSsAZiABIcAwZmWtLFlBac/CttlA6R2xA5vwZLNW5iiFhGmzOG+mi/S3aDCF7cOIuVG4G3tBh7dmdT6WwYn8SiLX3BEAjBtT2vEjiyfln4VaLet8z6+eEZvzClGBf7cQ59uKZogKycgq9fGwLseU30ckLXMWVk2ij9C978sUAL/TquyA6Xs86pozO2eD+N+yEba2hWv7ueqW6lfsQJxGWew79VWDLINWjnvFWijYDpNQL0wU6CXDCfWhCfhjenx2KHco/WoFk1y2/oXAFygeSrwyUVwIDAQAB
TTL:				3600
After the DNS record has been created, you can restart the Transport service via the DKIM Signer application, and all your emails will be signed.
DKIM for Exchange Online
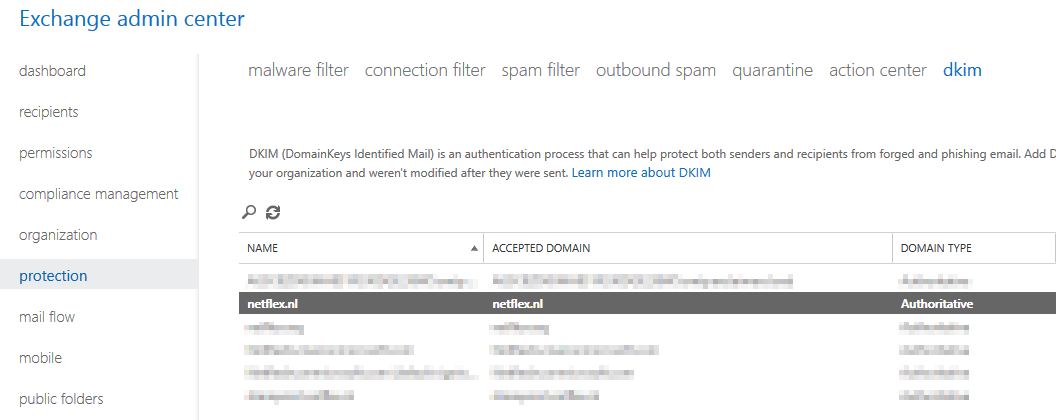
When you are using Exchange in the cloud or “Exchange Online”, DKIM is build into the o365 portal. You can find it in the “Exchange Management portal” under “Protection”, “dkim”.

Before you can enable DKIM on your o365 tennant, you need to add 2 cname records to your DNS:
Host name:			selector1._domainkey.<domain>
Points to address or value:	selector1-<domainGUID>._domainkey.<initialDomain>
TTL:				3600

Host name:			selector2._domainkey.<domain>
Points to address or value:	selector2-<domainGUID>._domainkey.<initialDomain>
TTL:				3600
For example:
Host name:			selector1._domainkey.netflex.nl
Points to address or value:	selector1-netflex-nl._domainkey.Netflexbv.onmicrosoft.com
TTL:				3600

Host name:			selector2._domainkey.netflex.nl
Points to address or value:	selector2-netflex-nl._domainkey.Netflexbv.onmicrosoft.com
TTL:				3600
After you have added these DNS-records, you can enable DKIM in Exchange Online, and it works.
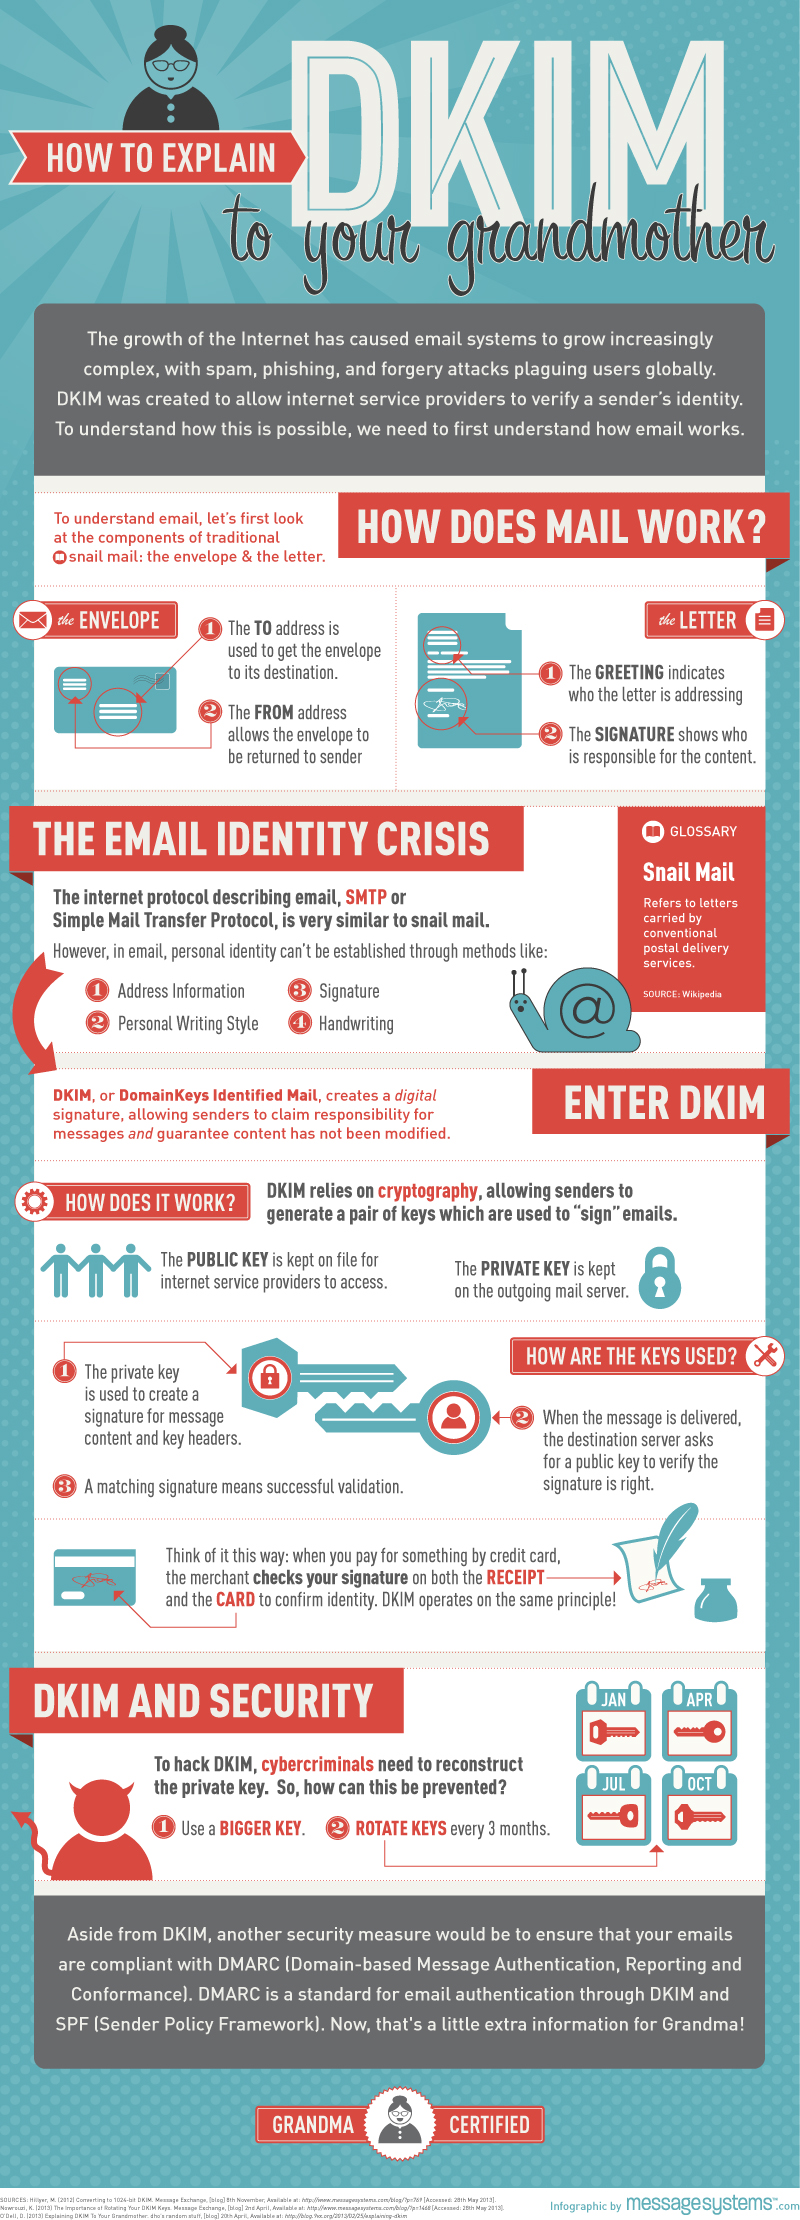
MessageSystems.com has a very cool and grandma-approved 😉 infographic on the subject:

Next time I will discuss DMARC (Domain-based Message Authentication, Reporting, and Conformance.
More information about DKIM you can find at:
https://en.wikipedia.org/wiki/DomainKeys_Identified_Mail
Since years there are some extra “settings” you can set to make sure your email does not get tagged as SPAM, as the other party can check if the email comes from a legitimate source.
There are some things you can do to make sure your email does not get tagged as SPAM:
- Do not get blacklisted.
- Make sure your server is not an open relay.
- Setup an Sender Policy Framwork (SPF)
- Setup a Domain-based Message Authentication, Reporting and Conformance (DMARC) policy
- Setup DomainKeys Identified Email
In the coming blogs I will write about how to setup SPF, DKIM and DMARC for an exchange system.

(SPF) Sender Policy Framework.
The Sender Policy Framework is published in 2006 by the IETF and made a standard in 2014. Originally called Sender Permitted From. The framework is setup to minimize the amount of spam coming in. In the SPF record you create you let the receiver end know from which ip-address or range of ip-adresses email sent by your organization can originate from. If the sending host is not in the SPF record, receiving mailservers can block the mail completely or mark it as spam.
An SPF record is setup in your DNS. It’s a TXT record.
There are lots of sites on the internet that test your spf record, lets have a look at our (Netflex.nl) SPF record:
 (From http://mxtoolbox.com/spf.aspx)
The first part of the spf record indicates the version of SPF: spf1
Then there are some includes, these are the domains that are searched for an allow when an email is accepted by a foreign server. The last option is -all, ?all or ~all depending if the email should:
Pass (+all)
Fail (-all)
SoftFail (~all)
Neutral (?all)
|
Result |
Explanation |
Intended action |
|
Pass |
The SPF record designates the host to be allowed to send |
accept |
|
Fail |
The SPF record has designated the host as NOT being allowed to send |
reject |
|
SoftFail |
The SPF record has designated the host as NOT being allowed to send but is in transition |
accept but mark |
|
Neutral |
The SPF record specifies explicitly that nothing can be said about validity |
accept |
|
None |
The domain does not have an SPF record or the SPF record does not evaluate to a result |
accept |
Our spf record is pretty strict and fails every email that does not fall in any of the includes. If you set up a spf record for the first time and do not know if every domain is accounted for in the spf record, you can set the qualifier to a setting that is less strict.
One of the best ways to create a good spf record for your environment is to check which sites sent mail for your domain, and then use a spf calculator, like the one on www.spfwizard.net
When you have created a well-defined spf record, go to your hosting provider and create a TXT record on their server with the appropriate settings.
To test your spf record you can use:
http://www.kitterman.com/spf/validate.html
I will discuss DKIM in my next blog.

Recent Comments