Monthly Archives: May 2017
In this 3-part blog I will discuss SPF, DKIM and DMARC. In this second part of the blog I will discuss DKIM.
DKIM stands for DomainKeys Identified Mail.
To understand how DKIM works, you can best look at it like when you sign a letter that you send by snailmail. DKIM sets up a form of signing for email, a key is sent with the email, which can be matched by the receiving party. If there is a match, then the signature of the email is genuine, and the email is forwarded to the receiving user. If there is no match, depending on the settings in the antispam tooling of the receiving party the email will be tagged as SPAM, deleted or just delivered.
DKIM for Exchange
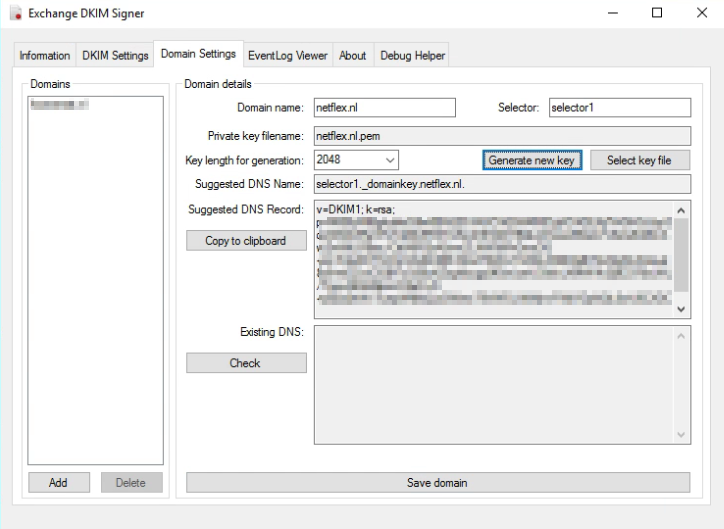
For Exchange onPrem there is “Exchange DKIMSigner” this is a freeware tool, which can add DKIM signing to your emails. (https://github.com/Pro/dkim-exchange).
With this tool you can easily generate a private key, and it shows you the suggested DNS record.
Setting the DNS record.
Setting the DNS record for Exchange Onprem works a bit different from setting the DNS record for Exchange Online. With Onprem you put the public key in the DNS record, so the other party can pick it up, with Exchange Online you point to another microsoft address for the public key (see DKIM for Exchange Online below).
With Exchange Onprem you only need one cname record:
Host name:			selector1._domainkey.<domain>
Points to address or value:	<Public Key Information>
TTL:				3600
For Example:
Host name:			selector1._domainkey.netflex.nl
Points to address or value:	v=DKIM1; k=rsa; p=MIIBIjANBgkqhkiG9w0BAQEFAAOCAQ8AMIIBCgKCAQEAjj7VrGHGJJzySqziW0AVReVFoTqlMo5RSTmKwZ3Fd2XY9QkJ21xweKEsxLFzSsAZiABIcAwZmWtLFlBac/CttlA6R2xA5vwZLNW5iiFhGmzOG+mi/S3aDCF7cOIuVG4G3tBh7dmdT6WwYn8SiLX3BEAjBtT2vEjiyfln4VaLet8z6+eEZvzClGBf7cQ59uKZogKycgq9fGwLseU30ckLXMWVk2ij9C978sUAL/TquyA6Xs86pozO2eD+N+yEba2hWv7ueqW6lfsQJxGWew79VWDLINWjnvFWijYDpNQL0wU6CXDCfWhCfhjenx2KHco/WoFk1y2/oXAFygeSrwyUVwIDAQAB
TTL:				3600
After the DNS record has been created, you can restart the Transport service via the DKIM Signer application, and all your emails will be signed.
DKIM for Exchange Online
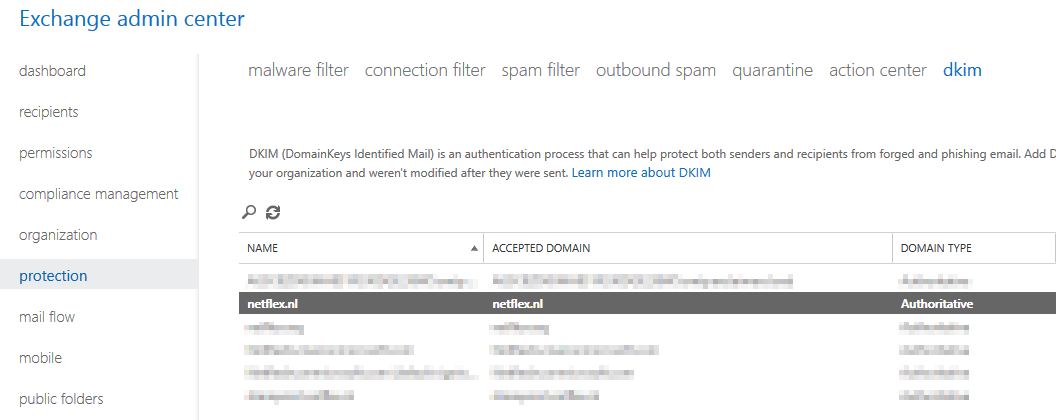
When you are using Exchange in the cloud or “Exchange Online”, DKIM is build into the o365 portal. You can find it in the “Exchange Management portal” under “Protection”, “dkim”.
Before you can enable DKIM on your o365 tennant, you need to add 2 cname records to your DNS:
Host name:			selector1._domainkey.<domain>
Points to address or value:	selector1-<domainGUID>._domainkey.<initialDomain>
TTL:				3600

Host name:			selector2._domainkey.<domain>
Points to address or value:	selector2-<domainGUID>._domainkey.<initialDomain>
TTL:				3600
For example:
Host name:			selector1._domainkey.netflex.nl
Points to address or value:	selector1-netflex-nl._domainkey.Netflexbv.onmicrosoft.com
TTL:				3600

Host name:			selector2._domainkey.netflex.nl
Points to address or value:	selector2-netflex-nl._domainkey.Netflexbv.onmicrosoft.com
TTL:				3600
After you have added these DNS-records, you can enable DKIM in Exchange Online, and it works.
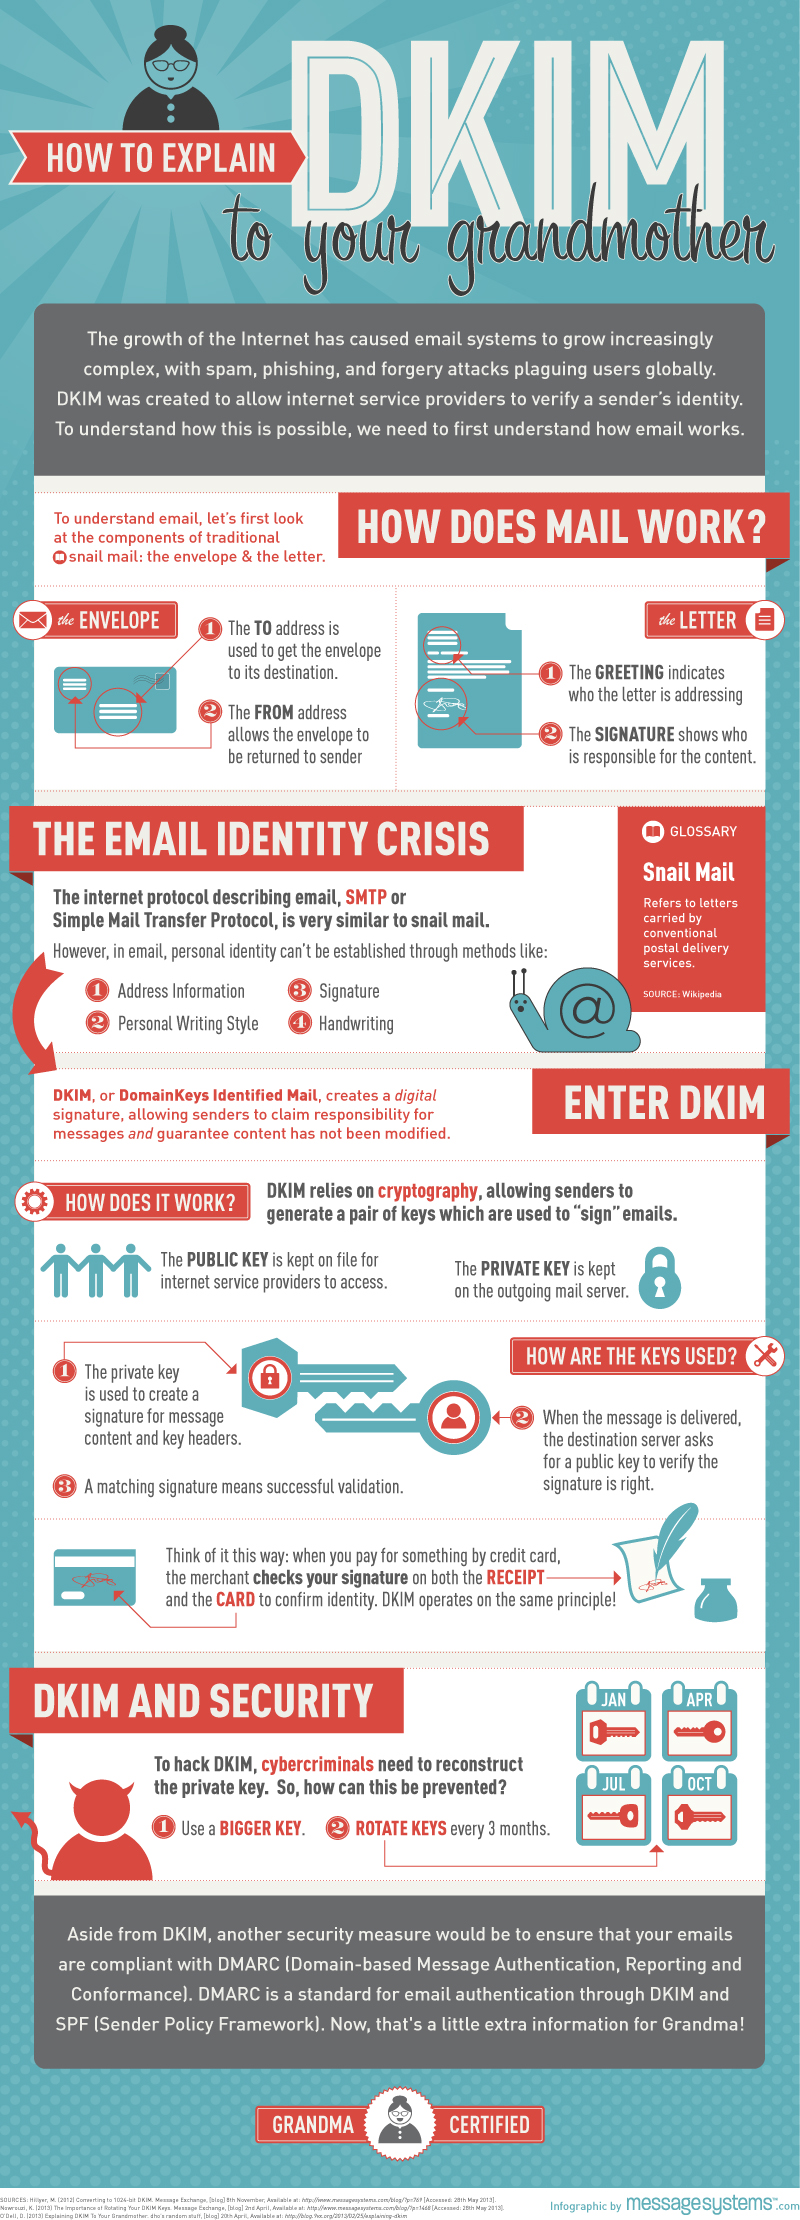
MessageSystems.com has a very cool and grandma-approved 😉 infographic on the subject:
Next time I will discuss DMARC (Domain-based Message Authentication, Reporting, and Conformance.
More information about DKIM you can find at:
https://en.wikipedia.org/wiki/DomainKeys_Identified_Mail
Recent Comments