Category Archives: Blog


Netflex is dit jaar weer aanwezig bij Microsoft Ignite. Dit jaar is het event in Orlando.
Aangekomen op vrijdagmiddag hebben we eerst de omgeving wat verkend. Orlando is bekend om zijn pretparken, maar omdat er vanuit Ignite al de mogelijkheid wordt gegeven om er 2 te bezoeken zijn wij op zoek gegaan naar alligators! Tijdens een airboat tour hebben we er meerdere mogen spotten.
Zondagavond hebben we een meeting van Microsoft bezocht waar we met andere partners en klanten uit Nederland gesproken hebben. Een leuk initiatief van Microsoft Nederland waardoor je een beetje bekend raakt met de andere Nederlanders die Ignite bezoeken.
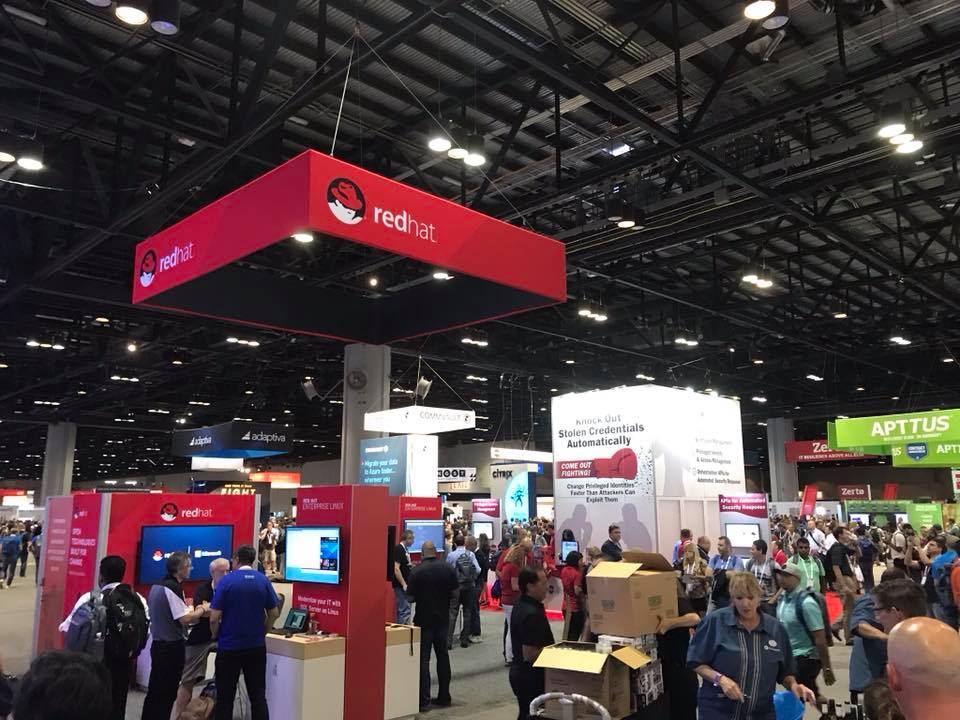
Maandag begint Ignite dan echt en Microsoft start het event door het geven van een Vision Keynote.
Tijdens de Keynote spreekt Satya Nadella over “Digital Transformation”, dit is het thema voor de 2 conferenties die nu gehouden worden, Ignite en Envision.
Hierin geeft Satya een aantal speerpunten:
• Empower Employees
• Engage Customers
• Optimize Operations
• Transform Products.
Satya geeft aan dat Office 365 gestoeld is op “simplicity”, “unlocking creativity” en “Collaboration” in dynamische teams.
Microsoft is nog steeds bezig met het verbeteren van de Hololens. Er komt aan het einde van dit jaar een nieuwe versie van uit. Tijdens de keynote wordt getoond hoe Ford slim gebruik maakt van de Hololens bij het design van hun auto’s.
Bing for Business is momenteel nog in preview. Bing for Business geeft je de mogelijkheid om te zoeken in eigen data, heeft integratie met verschillende 3rd party databases, en slim kan zoeken dmv machine learning. Een private preview ![]() is beschikbaar via de volgende link:
is beschikbaar via de volgende link:
https://forms.office.com/Pages/ResponsePage.aspx…
Als je de keynote volledig wilt zien, klik dan op de volgende link:
https://www.facebook.com/Microsoft/videos/10155103427648721/
Teams, Microsoft gaat groots inzetten op Microsoft Teams. Uiteindelijk zal teams Skype for Business gaan vervangen, de backend is hier al op voorbereid.
Eindstand maandag per persoon ![]() :
:
16514 stappen
11,3 km
17 verdiepingen
From Exchange 2016 CU6 and for Exchange Online customers it is now possible to control the “Sent Items” behaviour of delegated User Mailboxes. This control is available for shared mailboxes since 2015.
How does it work?
Let’s say you have the following scenario:
- Jack is the CEO of the company
- Iris is a delegate on Jack’s mailbox; Iris has Send As rights on Jacks mailbox
- When Iris sends an email as Jack, the mail will only be in Iris’s “Sent Items” folder.
With the new feature enabled, the email will not only be in Iris’s “Sent Items” folder but both Jack and Iris will have the message in their “Sent Items” folder.
How to enable these settings?
These settings have to be set via powershell and cannot be set via the EAC / o365 portal as with shared mailboxes.
To enable these settings for “Sent On behalf”:
Enable message copySent On Behalf of the delegator For emails Sent On Behalf of the delegator:
Set-Mailbox <delegator mailbox name> –MessageCopyForSendOnBehalfEnabled $true
Disable message copySent On Behalf of the delegator For emails Sent On Behalf of the delegator:
Set-Mailbox <delegator mailbox name> –MessageCopyForSendOnBehalfEnabled $false
To Enable these settings for “Sent As”
Enable Message copy:
Set-Mailbox <delegator mailbox name> –MessageCopyForSentAsEnabled $true
Disable Message copy:
Set-Mailbox <delegator mailbox name> –MessageCopyForSentAsEnabled $false
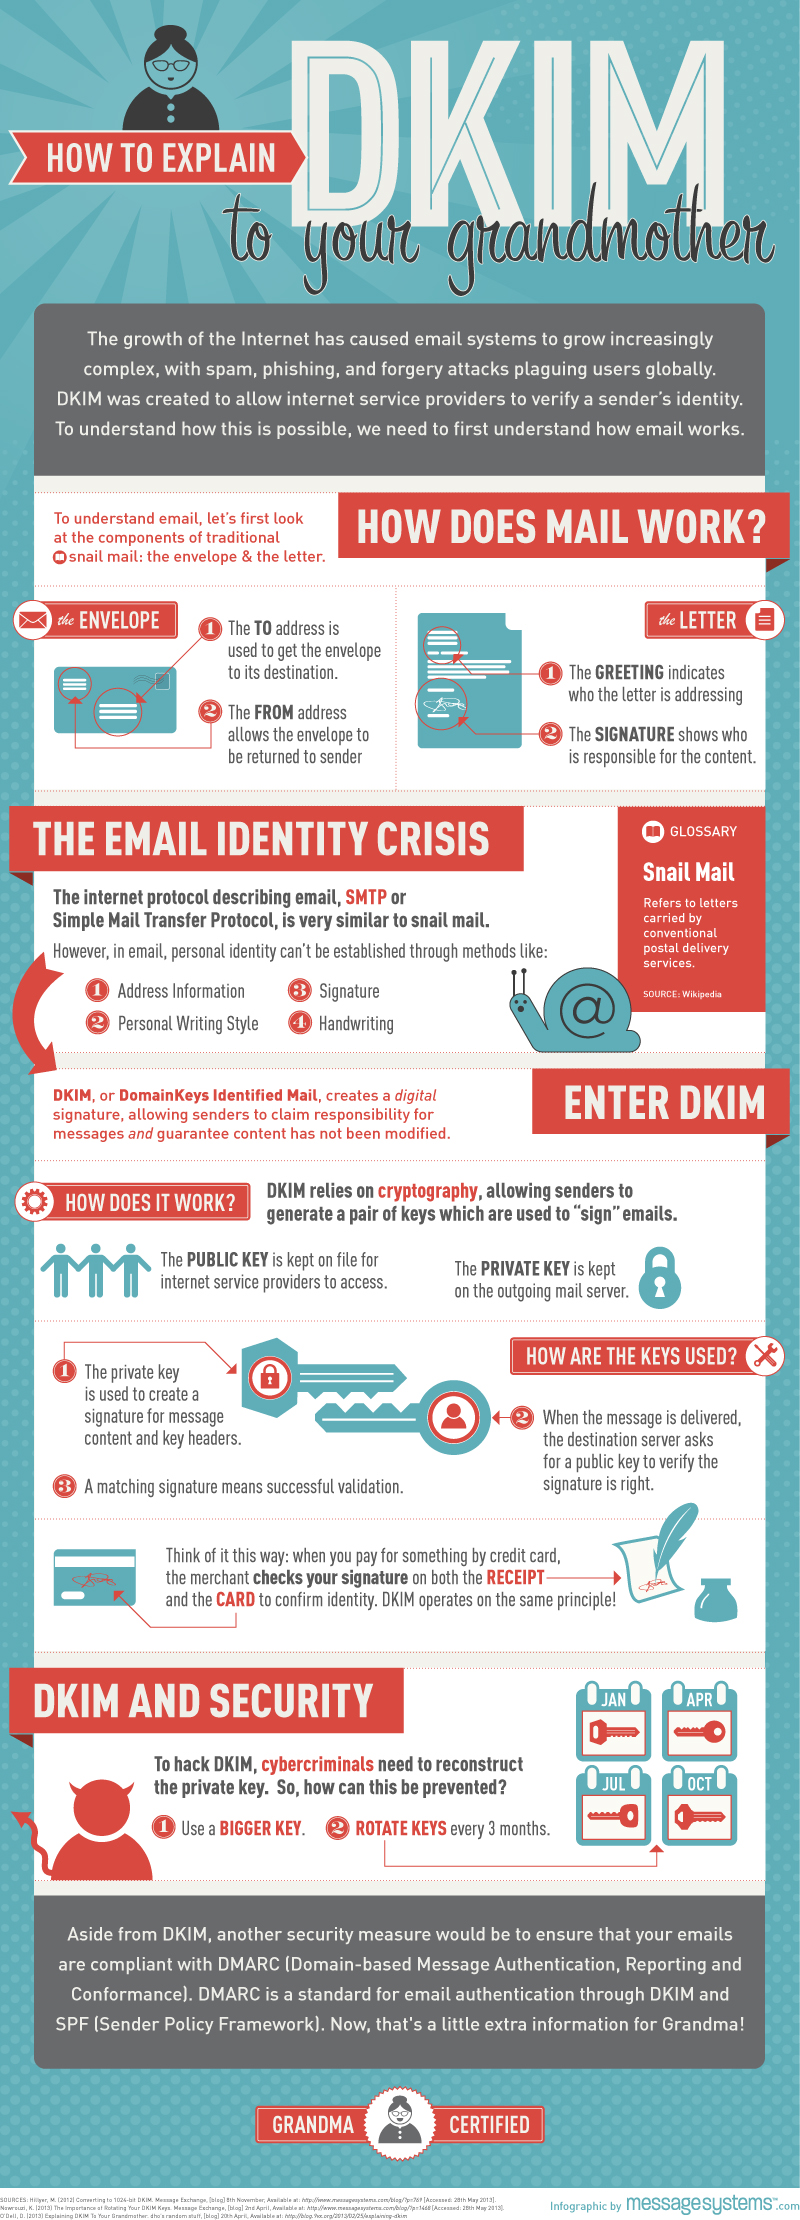
In this 3-part blog I will discuss SPF, DKIM and DMARC. In this second part of the blog I will discuss DKIM.
DKIM stands for DomainKeys Identified Mail.
To understand how DKIM works, you can best look at it like when you sign a letter that you send by snailmail. DKIM sets up a form of signing for email, a key is sent with the email, which can be matched by the receiving party. If there is a match, then the signature of the email is genuine, and the email is forwarded to the receiving user. If there is no match, depending on the settings in the antispam tooling of the receiving party the email will be tagged as SPAM, deleted or just delivered.
DKIM for Exchange
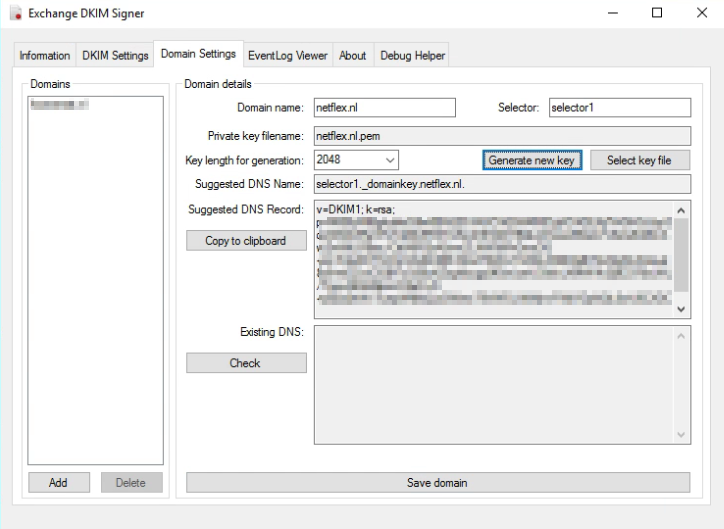
For Exchange onPrem there is “Exchange DKIMSigner” this is a freeware tool, which can add DKIM signing to your emails. (https://github.com/Pro/dkim-exchange).
With this tool you can easily generate a private key, and it shows you the suggested DNS record.
Setting the DNS record.
Setting the DNS record for Exchange Onprem works a bit different from setting the DNS record for Exchange Online. With Onprem you put the public key in the DNS record, so the other party can pick it up, with Exchange Online you point to another microsoft address for the public key (see DKIM for Exchange Online below).
With Exchange Onprem you only need one cname record:
Host name:			selector1._domainkey.<domain>
Points to address or value:	<Public Key Information>
TTL:				3600
For Example:
Host name:			selector1._domainkey.netflex.nl
Points to address or value:	v=DKIM1; k=rsa; p=MIIBIjANBgkqhkiG9w0BAQEFAAOCAQ8AMIIBCgKCAQEAjj7VrGHGJJzySqziW0AVReVFoTqlMo5RSTmKwZ3Fd2XY9QkJ21xweKEsxLFzSsAZiABIcAwZmWtLFlBac/CttlA6R2xA5vwZLNW5iiFhGmzOG+mi/S3aDCF7cOIuVG4G3tBh7dmdT6WwYn8SiLX3BEAjBtT2vEjiyfln4VaLet8z6+eEZvzClGBf7cQ59uKZogKycgq9fGwLseU30ckLXMWVk2ij9C978sUAL/TquyA6Xs86pozO2eD+N+yEba2hWv7ueqW6lfsQJxGWew79VWDLINWjnvFWijYDpNQL0wU6CXDCfWhCfhjenx2KHco/WoFk1y2/oXAFygeSrwyUVwIDAQAB
TTL:				3600
After the DNS record has been created, you can restart the Transport service via the DKIM Signer application, and all your emails will be signed.
DKIM for Exchange Online
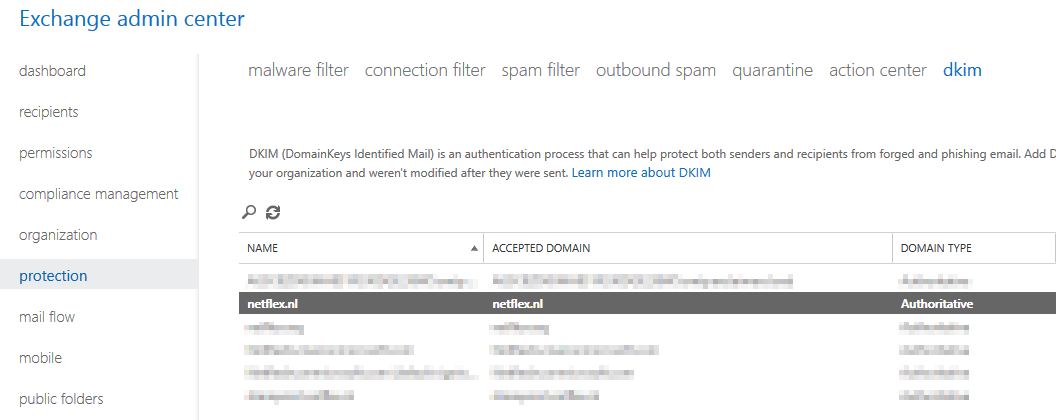
When you are using Exchange in the cloud or “Exchange Online”, DKIM is build into the o365 portal. You can find it in the “Exchange Management portal” under “Protection”, “dkim”.
Before you can enable DKIM on your o365 tennant, you need to add 2 cname records to your DNS:
Host name:			selector1._domainkey.<domain>
Points to address or value:	selector1-<domainGUID>._domainkey.<initialDomain>
TTL:				3600

Host name:			selector2._domainkey.<domain>
Points to address or value:	selector2-<domainGUID>._domainkey.<initialDomain>
TTL:				3600
For example:
Host name:			selector1._domainkey.netflex.nl
Points to address or value:	selector1-netflex-nl._domainkey.Netflexbv.onmicrosoft.com
TTL:				3600

Host name:			selector2._domainkey.netflex.nl
Points to address or value:	selector2-netflex-nl._domainkey.Netflexbv.onmicrosoft.com
TTL:				3600
After you have added these DNS-records, you can enable DKIM in Exchange Online, and it works.
MessageSystems.com has a very cool and grandma-approved 😉 infographic on the subject:
Next time I will discuss DMARC (Domain-based Message Authentication, Reporting, and Conformance.
More information about DKIM you can find at:
https://en.wikipedia.org/wiki/DomainKeys_Identified_Mail
Since years there are some extra “settings” you can set to make sure your email does not get tagged as SPAM, as the other party can check if the email comes from a legitimate source.
There are some things you can do to make sure your email does not get tagged as SPAM:
- Do not get blacklisted.
- Make sure your server is not an open relay.
- Setup an Sender Policy Framwork (SPF)
- Setup a Domain-based Message Authentication, Reporting and Conformance (DMARC) policy
- Setup DomainKeys Identified Email
In the coming blogs I will write about how to setup SPF, DKIM and DMARC for an exchange system.
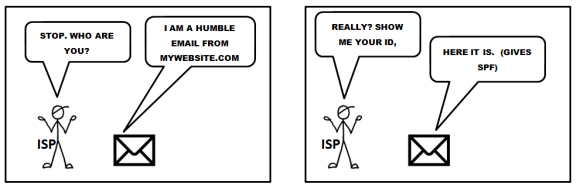
(SPF) Sender Policy Framework.
The Sender Policy Framework is published in 2006 by the IETF and made a standard in 2014. Originally called Sender Permitted From. The framework is setup to minimize the amount of spam coming in. In the SPF record you create you let the receiver end know from which ip-address or range of ip-adresses email sent by your organization can originate from. If the sending host is not in the SPF record, receiving mailservers can block the mail completely or mark it as spam.
An SPF record is setup in your DNS. It’s a TXT record.
There are lots of sites on the internet that test your spf record, lets have a look at our (Netflex.nl) SPF record:
 (From http://mxtoolbox.com/spf.aspx)
The first part of the spf record indicates the version of SPF: spf1
Then there are some includes, these are the domains that are searched for an allow when an email is accepted by a foreign server. The last option is -all, ?all or ~all depending if the email should:
Pass (+all)
Fail (-all)
SoftFail (~all)
Neutral (?all)
|
Result |
Explanation |
Intended action |
|
Pass |
The SPF record designates the host to be allowed to send |
accept |
|
Fail |
The SPF record has designated the host as NOT being allowed to send |
reject |
|
SoftFail |
The SPF record has designated the host as NOT being allowed to send but is in transition |
accept but mark |
|
Neutral |
The SPF record specifies explicitly that nothing can be said about validity |
accept |
|
None |
The domain does not have an SPF record or the SPF record does not evaluate to a result |
accept |
Our spf record is pretty strict and fails every email that does not fall in any of the includes. If you set up a spf record for the first time and do not know if every domain is accounted for in the spf record, you can set the qualifier to a setting that is less strict.
One of the best ways to create a good spf record for your environment is to check which sites sent mail for your domain, and then use a spf calculator, like the one on www.spfwizard.net
When you have created a well-defined spf record, go to your hosting provider and create a TXT record on their server with the appropriate settings.
To test your spf record you can use:
http://www.kitterman.com/spf/validate.html
I will discuss DKIM in my next blog.

When ADFS is deployed and users are browsing to sharepoint online without configuring auto-acceleration users are required to provide their username before the can enter their Sharepoint environment.

Sometimes it could be handy to save all members of an AD group to a text file.
This simple script will display all members of an Active Directory group on screen and mail the result to the logged in user (user@domain.com) if desired.
Sometimes when a new user is added to a team he or she needs all, or a selection of the Active Directory groups his colleagues are member of. Unfortunately, this can’t be done with the native Active Directory tools. To overcome this, I made a Powershell script to (selectively) copy Active Directory user group membership from one user to another.
When a (file) cluster resource failover occurred it is not always desirable to do an automatic failback (you probably would investigate the reason for the failover before performing a failback of the resources). Because of this I have created a Powershell script for use with file clusters to monitor file cluster resources, it works pretty much like the Powershell script I made for monitoring Exchange Database failovers (https://netflex.nl/exchange-database-activation-preference ).
The Powershell script monitors the preferred owner of a resource. In the event the Powershell script detects a resource is not running on the preferred owner, the Powershell script will send an email alert to a predefined recipient.
This blog provides information on how to migrate your Windows Server 2008 or Windows Server 2008 R2 DHCP server to Windows Server 2012 R2.
First, to be on the save side, create a backup of the Windows Server 2008 (R2) DHCP configuration and save it to disk. Now the backup is in place inventory your DHCP relay configuration, you will need this information later.
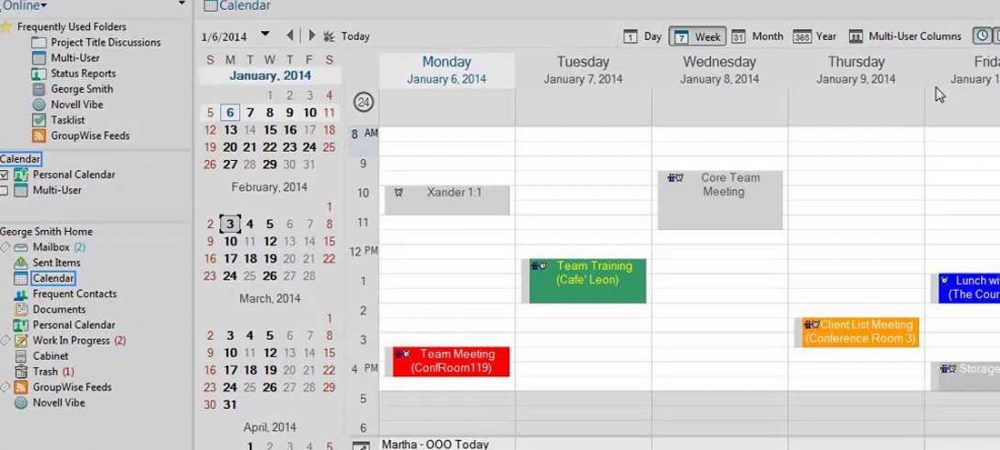
This week Micro Focus has released its new version of GroupWise, GroupWise 2014 R2
This version of GroupWise which builds further on GroupWise 2014 setting, will support IMAP, CardDav and CalDav protocols.
The support for these protocols means that Mac users can now access GroupWise via their native Mac OS Mail, Calendaring and Addresbook software. Which is great, because there was no official Mac client available since GroupWise 7!
Recent Comments